Following the breakout of blockchain technology, smart contracts have also experienced popularity and acceptance. A smart contract is a self-executing program, these contracts are executed when the registered conditions are met. These contracts are protocols that executes and enforces contract conditions. Developers leverage these contracts to automate payments, eliminate need for a middleman and promote a transparent system.
The step-by-step guide to building smart contracts on Ethereum are: Connect to the Ethereum Network, Choose a Test Network, Add some Testnet ETH to your wallet, Write your smart contact , Create a .Sol extension file, Compile your smart contract code, Deploy the smart contracts, Make your smart contract go live.
Before going deep into the step-by-step guide for building smart contracts on Ethereum, let examine what the Ethereum Virtual Machine is and what it does.
Ethereum Virtual Machine ( EVM)
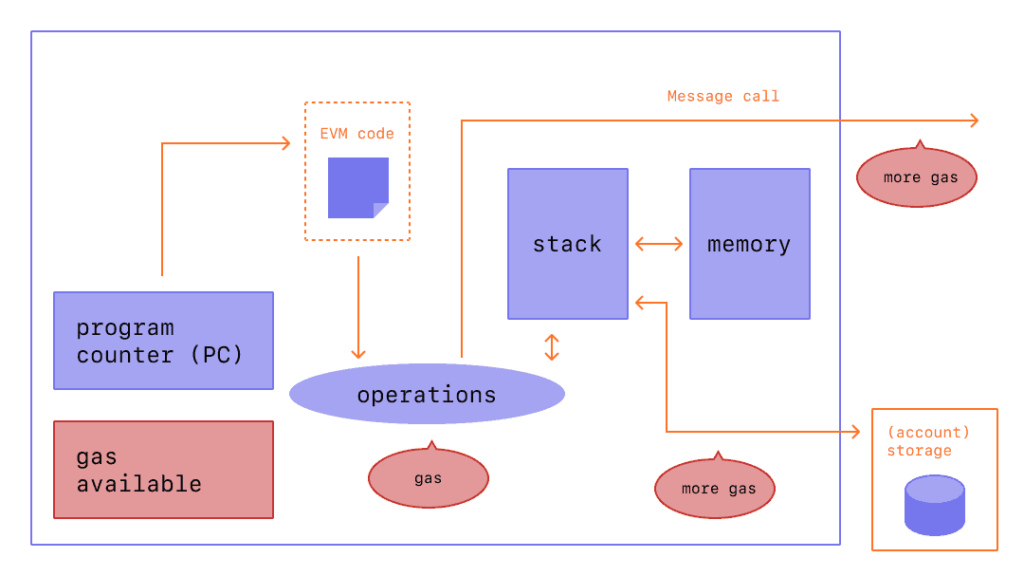
Ethereum Virtual Machine acts as the runtime environment and execution engine for smart contracts, which enables decentralized execution of code and creation of decentralized applications ( Dapps) on the Ethereum blockchain. Other functions of EVM are: Consensus Mechanism, Cross-Compatibility, Security and Isolation and Gas system. EVM leverages the gas system to allocate computational resources on the Ethereum Network. The more complex the computation, the more the amount of gas required to run the smart contract.
Benefits Of Using Smart Contracts
Below are some of the main advantages of Smart Contracts
- Transparency: One of the core advantages of smart contracts is transparency, and this is made possible by the immutable feature of smart contracts, hence once a smart contract is deployed it cannot be altered by any party. This feature makes sure there is a high level of transparency and that the details of the contracts are made accessible to all parties
- Speed and Execution:
Speed and Execution are one of the core advantages of smart contracts. These contracts eliminate the involvement of third parties or middlemen and this helps to save time and money as there is no need for physical presence of any intermediaries during the course of signing the contract.
3. Security and Reliability:
Security and Reliability is one of the unique selling points of smart contracts. These contracts are secured by the cryptographic feature of the blockchain. This cryptographic feature protects sensitive information from unauthorized access, by converting this information into a format ( encoded data) that can’t be understood by these unauthorized parties.
4. Global Accessibility and Interoperability:
Smart contacts make it possible for anyone with an internet connection to have access to smart contracts regardless of their location. The interoperable feature of smart contracts is the ability of different technologies and networks to interact and networks to interact and communicate with each other seamlessly.
To learn about how Blockchain Interoperability Links Network together, check here
Just deployed and interacted with my first ever cross-chain smart contract. ⛓️🌉⛓️
After years of having a single chain mental model when building smart contracts, it's pretty mind blowing when you see contracts across chains talk to eachother in a trust minimized way
— Harry Papacharissiou (@pappas9999) July 5, 2023Step-by-Step Guide of building smart contracts on Ethereum
Below is a step-by-step guide on how to create and deploy a smart contract on Ethereum.
- Connect to the Ethereum Network
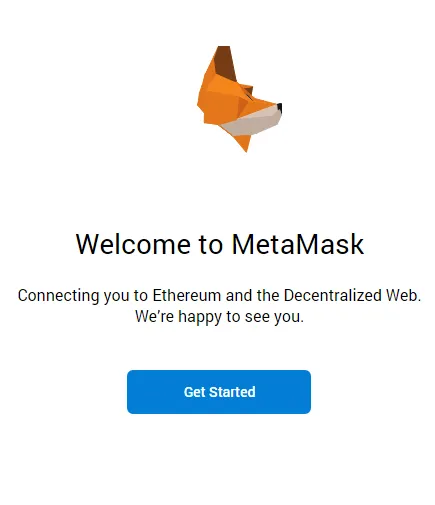
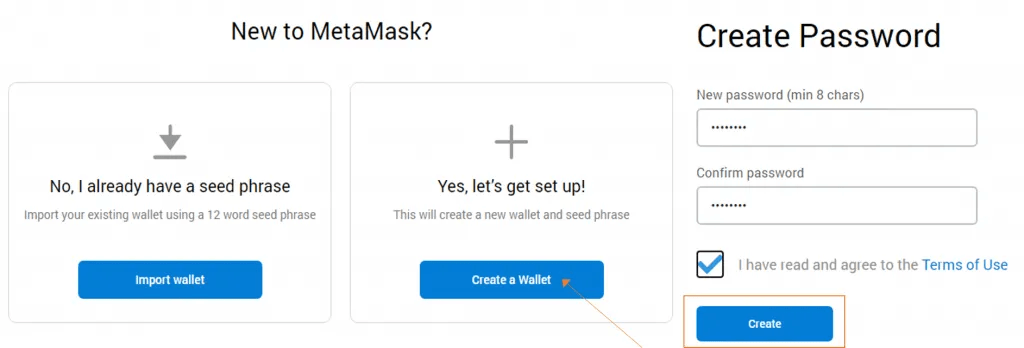
Connect to Ethereum Mainnet by downloading and installing Metamask wallet on Chrome browser and then proceed to enable it. When the Metamask wallet has been set up( create a wallet and password), you can proceed to connect it to the Ethereum Mainnet.
Remember to store your secret backup and don’t share with anyone so you don’t lose your crypto to someone else.
- Choose a Test Network
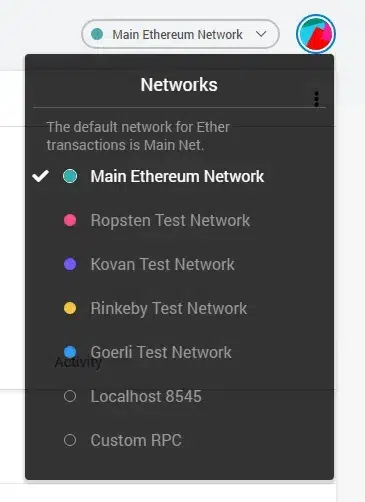
From the list of test networks in Metamask wallet, select one of these test networks. This test network is going to be used to test the smart contract you are building. Some of the popular test networks are:
- Ropsten Test Network
- Kovan Test Network
- Goerli Test Network
- Rinkeby Test Network
- Add some Testnet ETH to your wallet
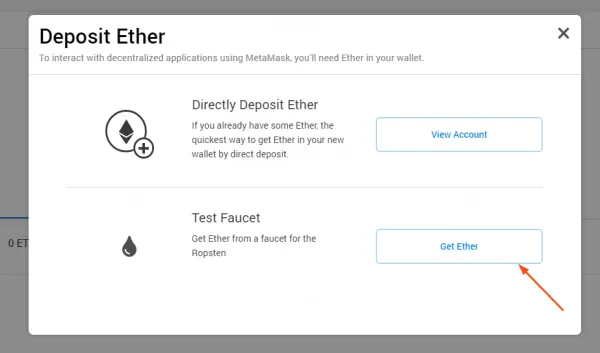
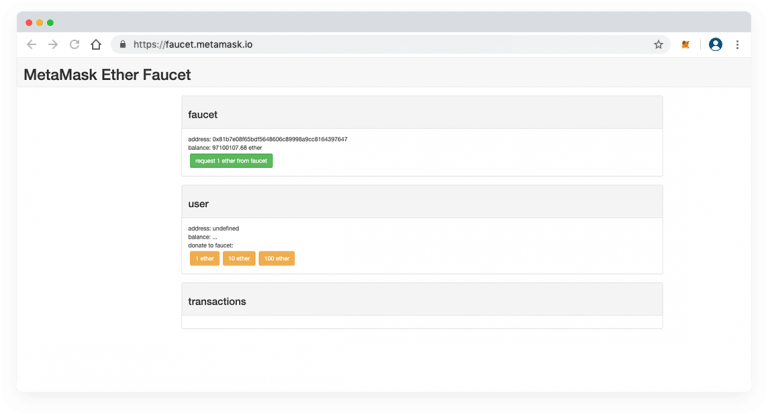
After you have chosen a test network, you need to add some Testnet ETH in your wallet to test your smart contract. To add Testnet ETH in Metamask, you click on the “ Deposit” and “ Get Ether” buttons under the Test Faucet and then proceed with the instructions that follows.
- Write your smart contact
Use the editor in the Remix Browser IDE to write your smart contract in solidity. The browser has several features and it is used to write basic smart contracts, hence it’s best for writing smart contracts.
Below are some features of the Remix Browser IDE
- Integrated Debugger
- Integrated Testing and Deployment Environment
- Syntax and Error highlighting
- Direct deployment to Metamask
You can start writing your first smart contracts code by visiting Remix IDE
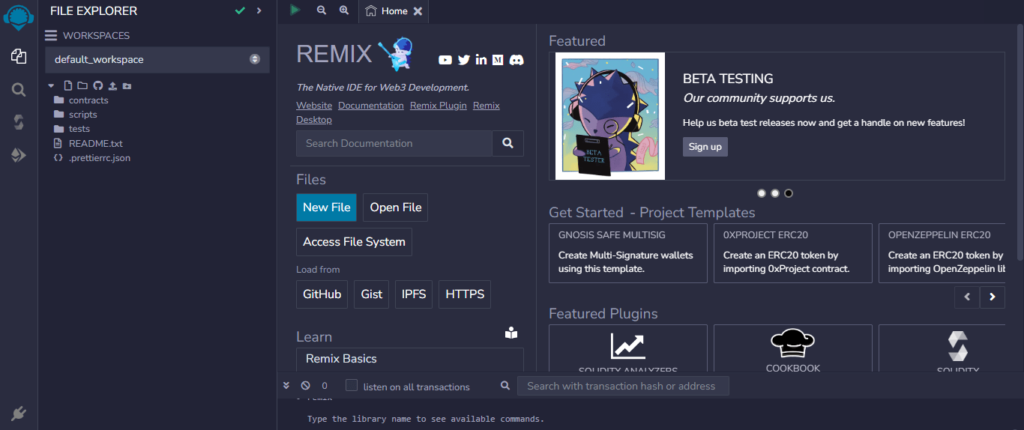
- Create a .Sol extension file
On the remix browser, click on the Plus (+) icon on the left side to create a .Sol extension. This makes the programmed file solidity compatible.

- Compile your smart contract code
Select compiler from the remix browser and compile the solidity smart contract code
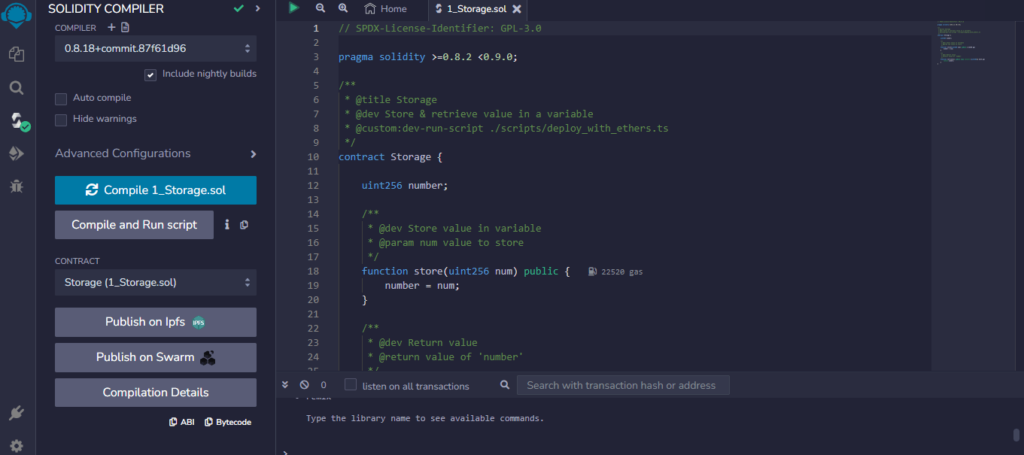
- Deploy the smart contracts
You can deploy the smart contract on your selected Ethereum test network by clicking on the “deploy button” on the remix browser. When the transaction is complete, the address of the smart contract will appear on the right hand side of the remix browser
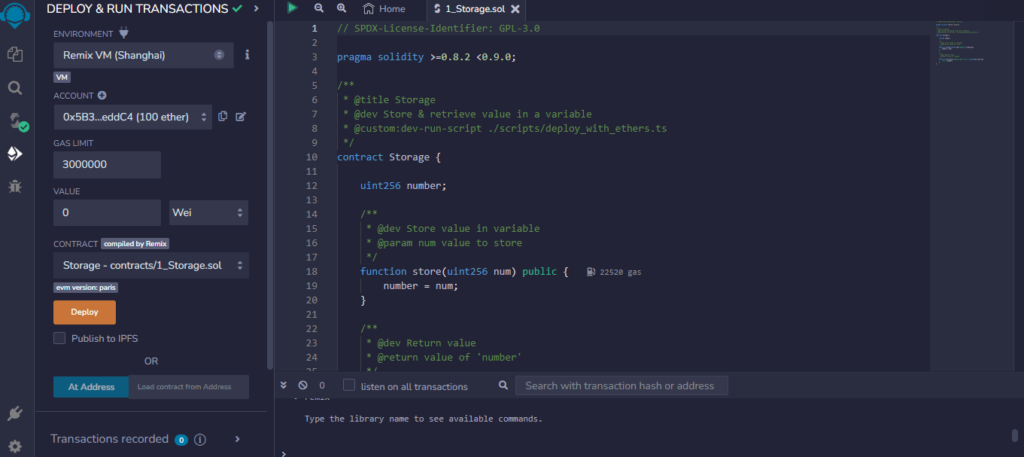
- Make your smart contract go live
Before the smart contract goes live on the Ethereum blockchain, you need to perform some testing and auditing.
Below are some few steps to test an Ethereum smart contract
- Run all your smart contract methods, you can access these methods on the right-hand side of the remix browser
- Transfer some tokens from your wallet address to other ethereum wallet addresses, then check the balance of the recipient address via the balance method
- You can get the total number of tokens that exist within a token contract ( Total Supply) via the total supply method.
Once the smart contract satisfies the essential requirements, then we can conclude that the smart contract is ready to hit the market and it is then deployed to the Ethereum Mainnet.
Conclusion
Beyond all doubts, we can all agree that smart contracts are next-generation applications that have the potential to impact several industries. Hence, having a solid knowledge of smart contract creation will help you launch a thriving career in the web3 space.
Furthermore, it makes it easy for you and your clients/employer to tap into the endless potentials of blockchain technology.


